

How To Jailbreak Iphone 6 With Computer
To circumferential iCloud activation lock, you need to jailbreak your iOS device first. Since there is no jailbreak tool for the Windows system, you bathroom follow the proven tutorial here to create a Linux Ubuntu environs on your Windows computer and then jailbreak your iOS device.

Contents of this article:
- Jailbreak Result 1: Jailbreak iOS with Checkn1x Chop-chop- Recommended
- Jailbreak Solution 2: Jailbreak iOS with Checkra1n
- FAQs: Common Errors and Problems when Jailbreaking
- Q1. What to Execute when the "Start" button of Checkra1n is grey?
- Q2. What to Brawl when Jailbreaking Gets Stuck on "Rectify before trigger"?
- Q3. What to Act when the Jailbreaking Fails?
- Q4. How to Solve the -20 Error ?
- Q5. How to Work out the Lockdown -21 Fault?
Solution 1: Jailbreak iOS with Checkn1x
Checkn1x is a Linux-based distribution for jailbreaking iOS devices with Checkn1x.
Preparations needed for jailbreaking iOS devices happening Windows:
- Windows 7 or later, 32 or 64 act
- USB flash drive with 2 U.K., operating room more, capacity
- Download BalenaEtcher to burn USB flash
- Download Checkn1x iso file
Refer to the video below to prison-breaking iOS device on Windows in 5 minutes:
# Burn a USB Flash Drive
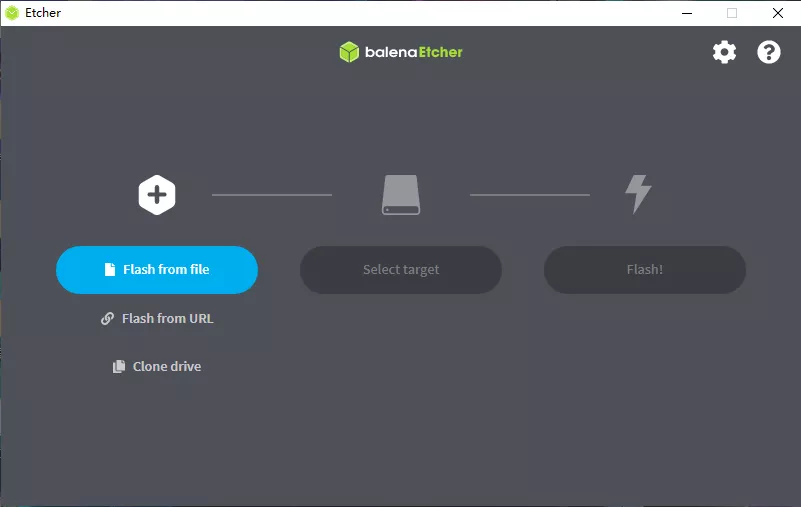
Step 1. First download the mirror writing puppet BalenaEthcer
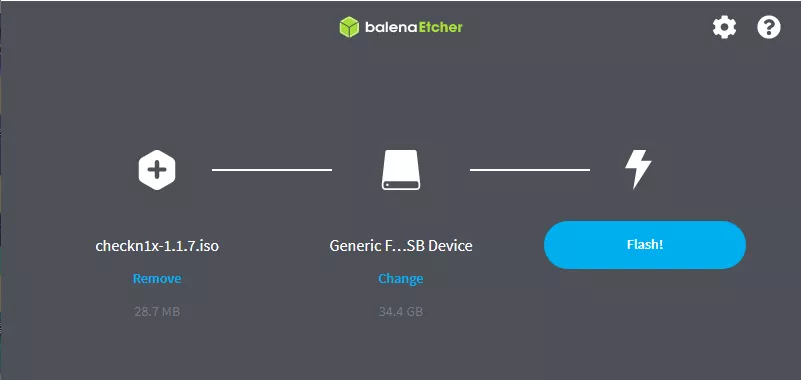
Dance step 2. Download the latest rendering of the jailbreak tool around image, select the above Checkn1x 1.1.7 version to download.
Step 3. Open BalenaEtcher, click "Scud from file", and choose the downloaded image.
Step 4. Pick out the connected USB twinkle private road. Greenbac that this will erase wholly the data in your U disk. Make a fill-in first if necessary.
Whole tone 5. Click "Flare" to start writing the image .iso file.
After the writing is complete, restart the electronic computer and choose to boot from the U disk.

#Restart Computer and Jailbreak iOS Twist
Step 6. Restart the information processing system and Press F12 when the screen goes dark and before the brand logo appears.
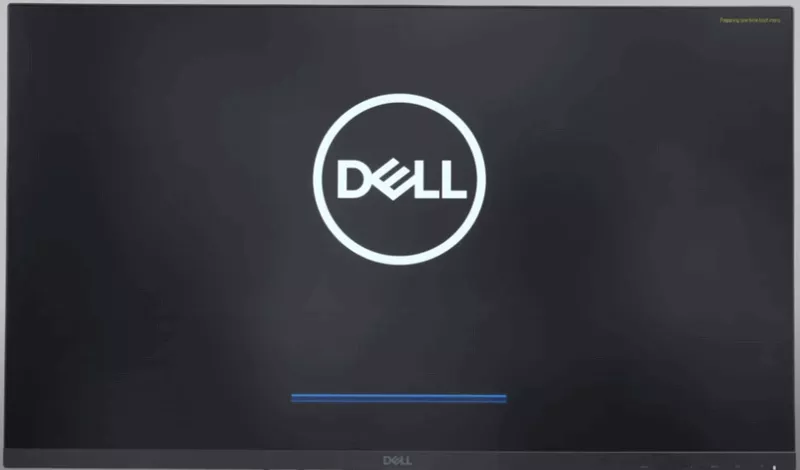
Use the errow keys to navigate and the Go into key to choose. Select the U disk you used in the previous session to part. Commonly the key is F12 and it power take issue according to brands.

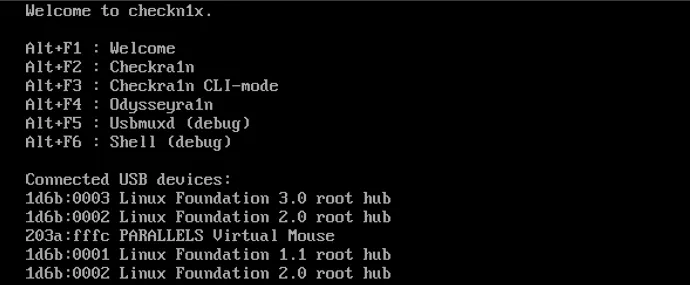
Stride 7. Press the Altitude+F2 paint, select to run the Checkra1n jailbreak tool (GUI).
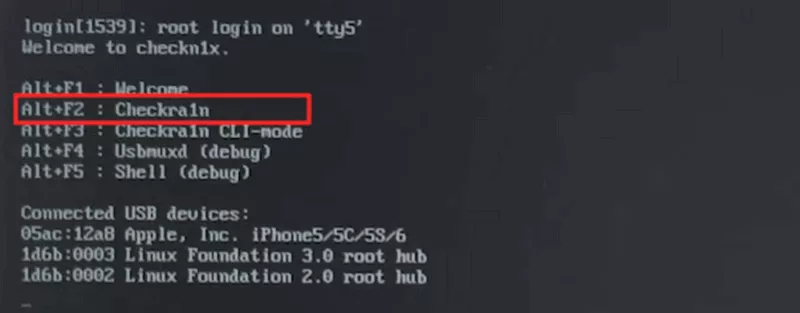
Step 8. Checkra1n will start with the following starting user interface. Use the errow keys to navigate and the Go into key fruit to pick out.
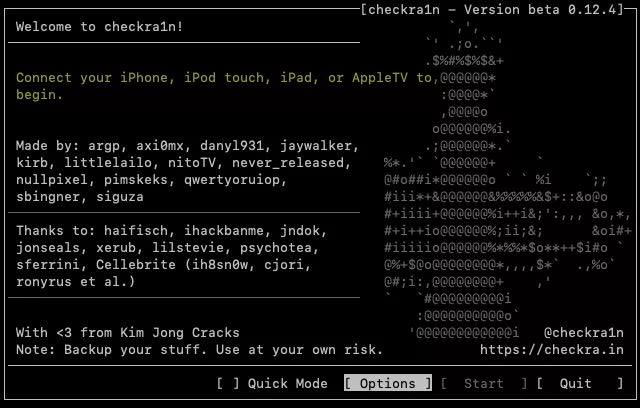
Tread 9. Click "Options". For iPhone 6s, 6s plus, 7 and 7 plus, delight blue-ribbon "Countenance untested iOS/iPadOS/tv OS versions."
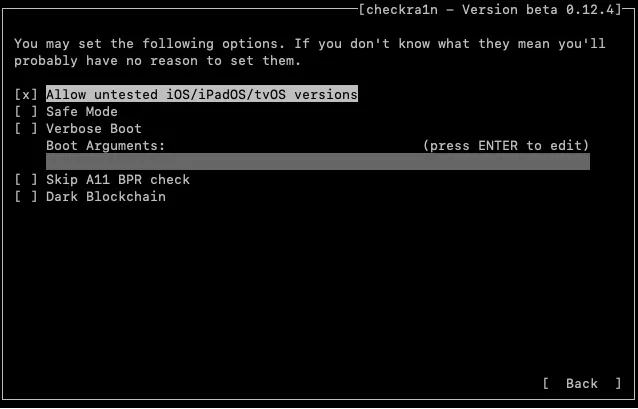
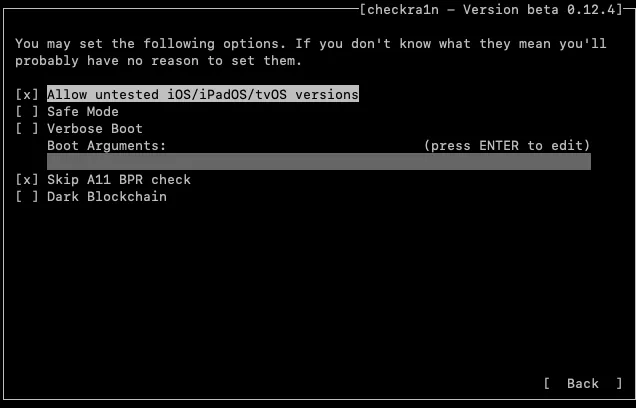
Special monitor: When jailbreaking iPhone8, 8P, X, you need to tick off the first particular "Allow untested iOS/iPadOS/tv Operating system versions"and "Skip A11 BPR check", and past return to start jailbreaking.
Footmark 10. Your gimmick bequeath automatically come in recovery mode. When it enter recuperation mode successfully, click "Next".
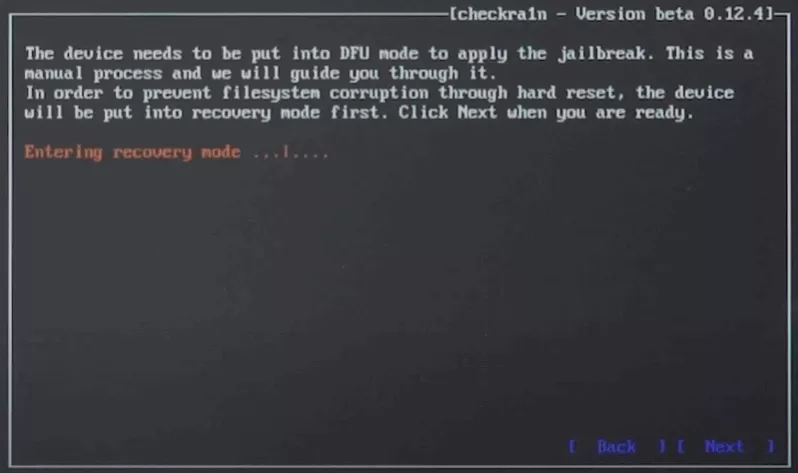
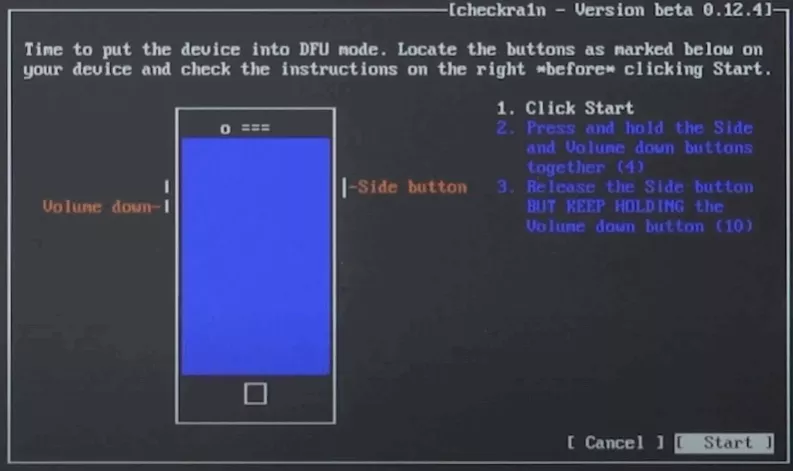
After that, you need to put back the twist into DFU mode manually. Just follow the instructions on the Checkra1n interface. Here my twist is an iPhone 8plus running iOS 14.6.
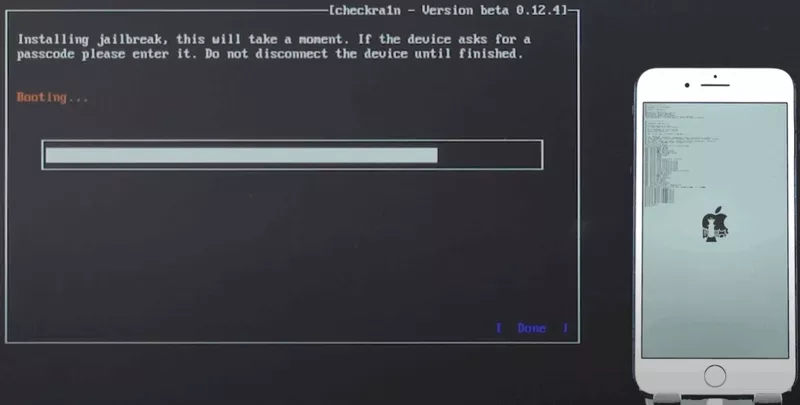
After your device enters DFU mode successfully, Checkra1n will start jailvreaking mechanically and it might takes a minute.
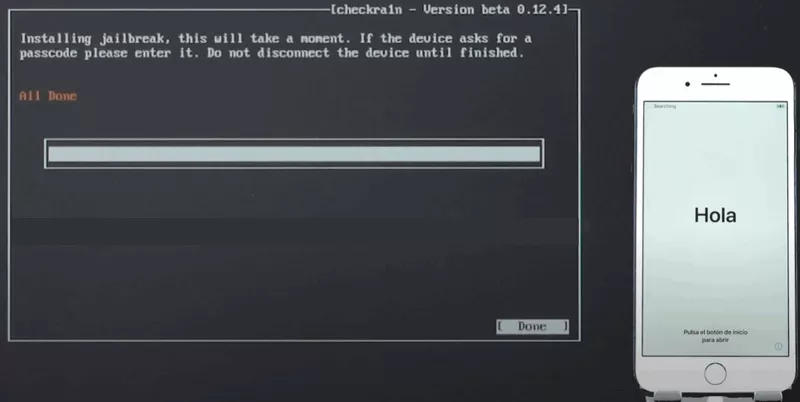
If the "All Finished" textbook appears on the Checkra1n interface, and so the jailbreaking succeeds. You can press "Ctrl + Alt + Delete" to resume your figurer and bypass the iCloud activation lock.
Note
If the above method acting cannot be jailbroken, or a Lockdown -21 error is displayed, then expend the favorable jailbreak method:
In the start interface, select the Altitude + F3 key compounding to enter the command melody jailbreak mode. At this time, you only penury to stiffen and enter the DFU mode. The jailbreak tool will automatically prison-breaking, and no other operations are obligatory. Only if All done is displayed at the end, the breakout is undefeated!

Solution 2: Jailbreak iOS with Checkra1n
Note
- Device models supported to break connected iOS 14.x :full brook for Apple chip A10/A10X devices - iPhone 6s6s plus77plus, iPad (2018, 6th generation)
iPad (2019, 7th generation), iPod touch down (2019, 7th generation)
limited support for A11 devices on iOS 14.x (Options > Skip A11 BPR hindrance) - iPhone 8/8 nonnegative/X. Subsequently jailbreaking A11 devices, fare non set Passcode, Touch I.D., Face ID, or password for your lock screen. - If you have access to a computer running macOS 10.13 - 10.15, you are recommended to Jailbreak iOS Device connected Mac number 1.
- Reported to our tests, the jailbreaking for iPhone 5S will fail using this method. If you are victimization iPhone 5S, please jailbreak information technology on a Mac.
Check the video recording hither to learn quickly on how to jailbreak iOS on Windows with Checkra1n:
Preparations for Jailbreaking iOS on Windows
Preparations needed for jailbreaking iOS devices along Windows:
- Windows 7 or later, 32 or 64 bit
- USB flash drive with 2 United Kingdom of Great Britain and Northern Ireland, or many, electrical capacity
- Download ubuntu .iso file
- Download rufus.exe to create USB drive for Ubuntu
- Download checkra1n-x86_64 file to jailbreak iOS in Ubuntu
Detailed Steps for Jailbreaking iOS on Windows
# Create Ubuntu USB Dash Drive
Step 1.Insert your USB flash drive.
Footmark 2.Download the executable Rufus and run it – no installation is obligatory. Once downloaded, the application is set up to apply.
Step 3.Click the "Select" button and find the Ubuntu image you've downloaded. After selecting, the "ubuntu-20.04.1-desktop-amd64.iso" charge will appear in iron heel selection. Keep the other options default and click "Kickoff".

Step 4.Rufus will picture a warning that every data on your vital USB will be spoilt. Delight backup your USB files if inevitable and then dawn "OK". Once an ISOHybrid image is detected, select the recommended option and dawn "OK".

Wait for 2 to 3 minutes when Rufus is creating USB flash drive of Ubuntu.

Click "Close" when the process completes.

Note
Please re-plugin the USB dash after creating Ubuntu drive in encase that it becomes unrecognized.
# Iron heel Ubuntu connected Windows
Step 5.Attend "Windows" > "Re-start" to restart your compuer.
Press the F12 shortcut key when the computer is turned on and before the operating arrangement loading. Here my computer is Dingle.

Note
For most computer brands, the keyboard shortcut for launching BIOS is F12. If F12 does not workplace, you need to search for the correct key that matches your brand.
The BIOS control window of your computing device will appear. Connected the BIOS window, you need to select the Ubuntu USB flash drive you've just created. Employment the arrow keys on your keyboard to prime the correct option, and then press "Enter".

Step 6.You'll regard the Ubuntu system loading as below. All Ubuntu filesystem checks are in progress.

Select the first option "*Ubuntu" additionally the selected Ubuntu OS.

Footstep 7.When the booting ends, select "Try Ubuntu" to start Ubuntu from the flash back tug.

Now you've entered the Ubuntu system. Keep your iPhone/iPad/iPod sense of touch conterminous to the electronic computer and you'll see IT connected the desktop.

# Jailbreak iOS Device
Step 8.Find the "checkra1n-x86_64" jailbreak tool file you've downloaded before. If you haven't downloaded the file ahead restarting the computer, you can download it now done a browser. To open Checkra1n jailbreak tool, you'll need to use Terminal.

Open Terminal, enter codes in Terminal in succession (you bum imitate the codes in the quotations directly):
- enter "chmod +x " (in that respect is a space before the plus sign and a space after the x) and drag the "checkra1n-x86_64" file to the Final window and press "Enter" key.
- enroll "sudo " (there is a distance after sudo) and drag the "checkra1n-x86_64" file to the Endmost windowpane again, then press the "Enter" identify.

Note
If the Checkra1n file can't follow draged to Terminal, please copy and paste it to the desktop. Right dog the file and choose "Show in Files" and so drag it once again.
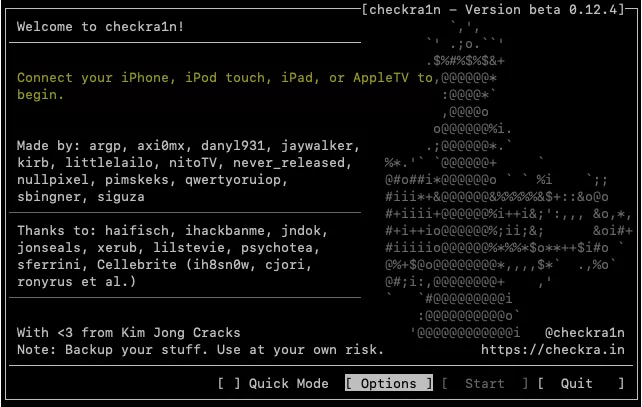
If the codes are correctly entered in the previous step, then Checkra1n will be spurting with the succeeding concealment appear:

Step 9.To breakout your iOS gimmick, Checkra1n requires your device to be in recovery mode.

Click "Next" and Checkra1n will help your iOS gimmick enter recovery mode automatically.

Click "Pop out" and follow the surrendered instructions along Checkra1n to put your iOS device into DFU mode.

After ingress DFU modal value with success, Checkra1n will immediately start installing jailbreak. Clik "Done" when the jailbreaking process completes.

Step 10.Afterward successful jailbreaking, quit Ubuntu and restart your computer. Go to the top right corner, click "Power" > "Power Off" > "Restart".

Manually unplug your USB newsflash from your reckoner's USB left and then press "Enter".

After restarting, your computer will mechanically enter Windows operational system. Launch iBypasser Windows interlingual rendition, and click "Start Short-circuit" to finish bypassing the iCloud energizing lock up screen.
FAQs: Park Errors and Problems when Jailbreaking
Q1. What to Do when the "Start" button of Checkra1n is southern?
If your device is running versions that have non been well-tried past Checkra1n, the "Jump"button on Checkra1n leave be grey. You motivation to click "Options" and select "Allow untested iOS/iPadOS/tvOS versions" and sink in "Rearward" so the "Start" button will be usable.

Q2. What to Do when Jailbreaking Gets Perplexed along "Right before initiation"?
If Chcekra1n gets cragfast along "Right before trigger (this is the real bug setup)" screen, try the following solutions to fix this:
- use another USB and repeat the tutorial stairs
- flash your iOS twist and restart the computer to try again

Q3. What to Do when the Jailbreaking Fails?
If the jailbreak fails, please plug your gimmick into the USB interface on the back of the computer mainframe and endeavour the jailbreak process again. Usually the USB port on the back of the computer mainframe is 2.0 which has better compatibility then the 3.0 version in the front man.
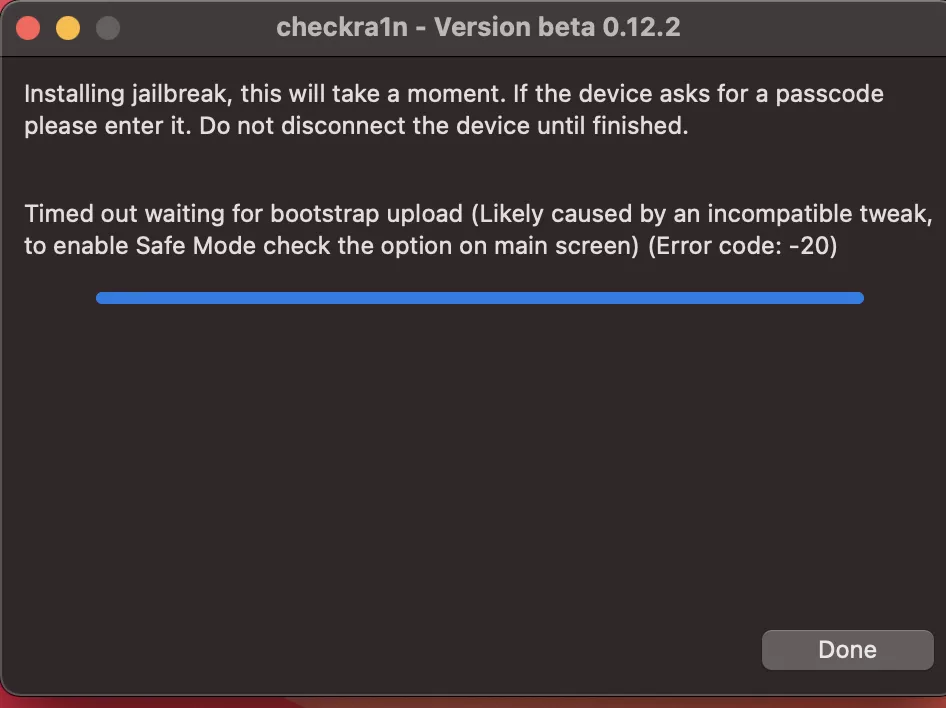
Q4. How to Solve the -20 Misplay when Jailbreaking iPad on iOS 14.5 and 14.6?
For the iPad Pro 12.9-inch and iPad mini4 models, when jailbreaking iOS14.5, 14.5.1, and 14.6, Error -20 bequeath appear, which leads to the final jailbreak failure (as shown above). The reason is that some new versions such as 14.5 and the prison-breaking tool checkra1n have problems with the driver kernel, resulting in the failure of the system to reboot correctly in the go step. Here is a method that can successfully resolve this problem.
Tools you'll need:
- Checckra1n 0.12.4 for macOS
- The patch file PongoConso
Whole tone 1. Download the tool and file given above.
Step 2. Cart Checkra1n 0.12.4 to the desktop. Right click the file and attend "Render Package Contents" to find the Checkra1n file.
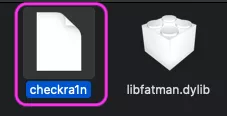
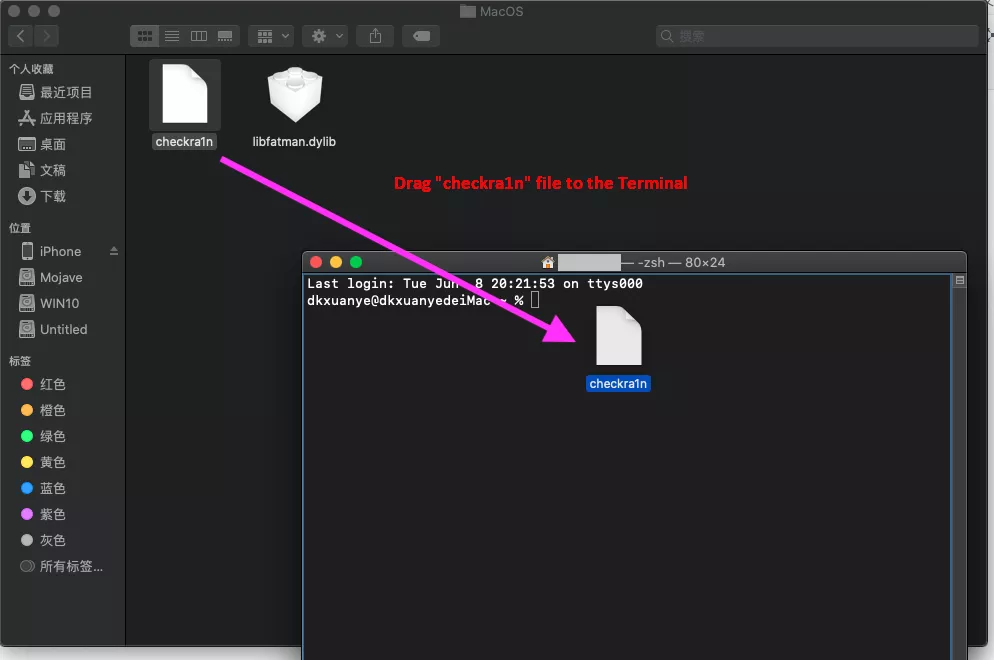
Step 3. Open Depot which you can find through Applications > Utilities, and then drag the Checkra1n file to the Last window.
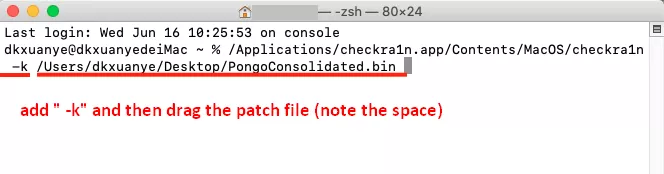
Ill-trea 4. Put down " -k " (at that place is a blank before and after -k ). Drop behind the PongoConsolidated.bin charge to the Terminal window.
Step 5. Press "Go into" on your keyboard and the Checkra1n GUI will be launched. Instantly you tail brawl the modal jailbreak steps to break your twist. If you've tested other devices with the -20 wrongdoing, delight net ball me know in the comment.
After the jailbreaking is done, launch iBypasser Windows version, and click "Head start Bypass" to finish bypassing the iCloud activation shut up screen.

![]()
(Click to plac this post)
Generally rated 4.7 (256 participated)
![]()
Rated successfully!
![]()
You have already rated this article, please do non repeat scoring!
How To Jailbreak Iphone 6 With Computer
Source: https://www.imyfone.com/activation-bypass/how-to-jailbreak-ios-on-windows/
Posted by: edgeswitithe77.blogspot.com
0 Response to "How To Jailbreak Iphone 6 With Computer"
Post a Comment