

How To Change Image Size In Premiere Pro
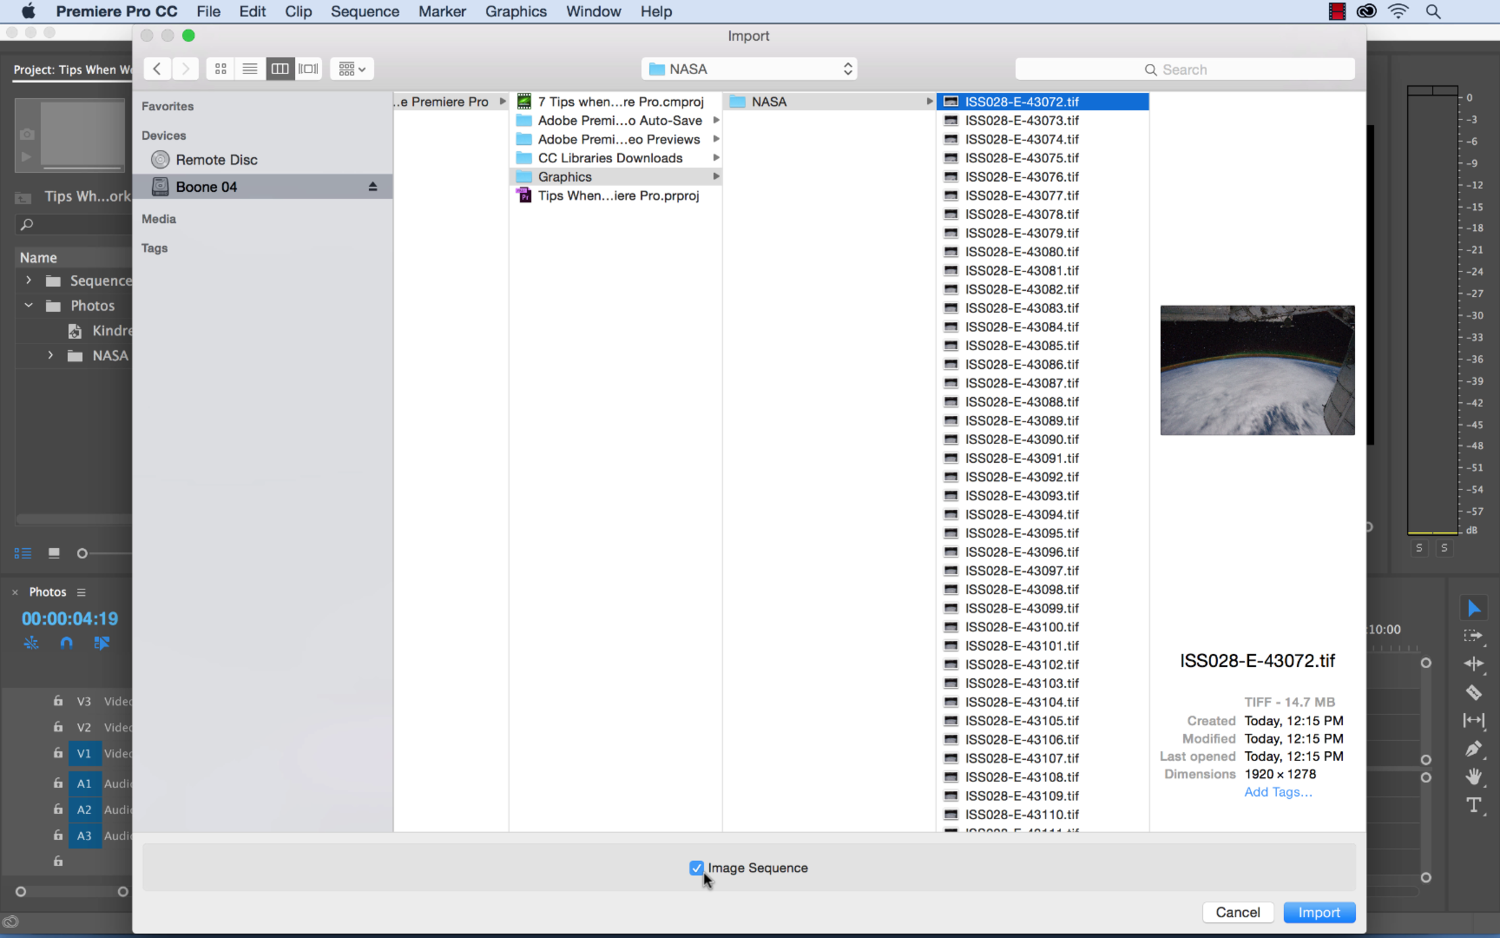
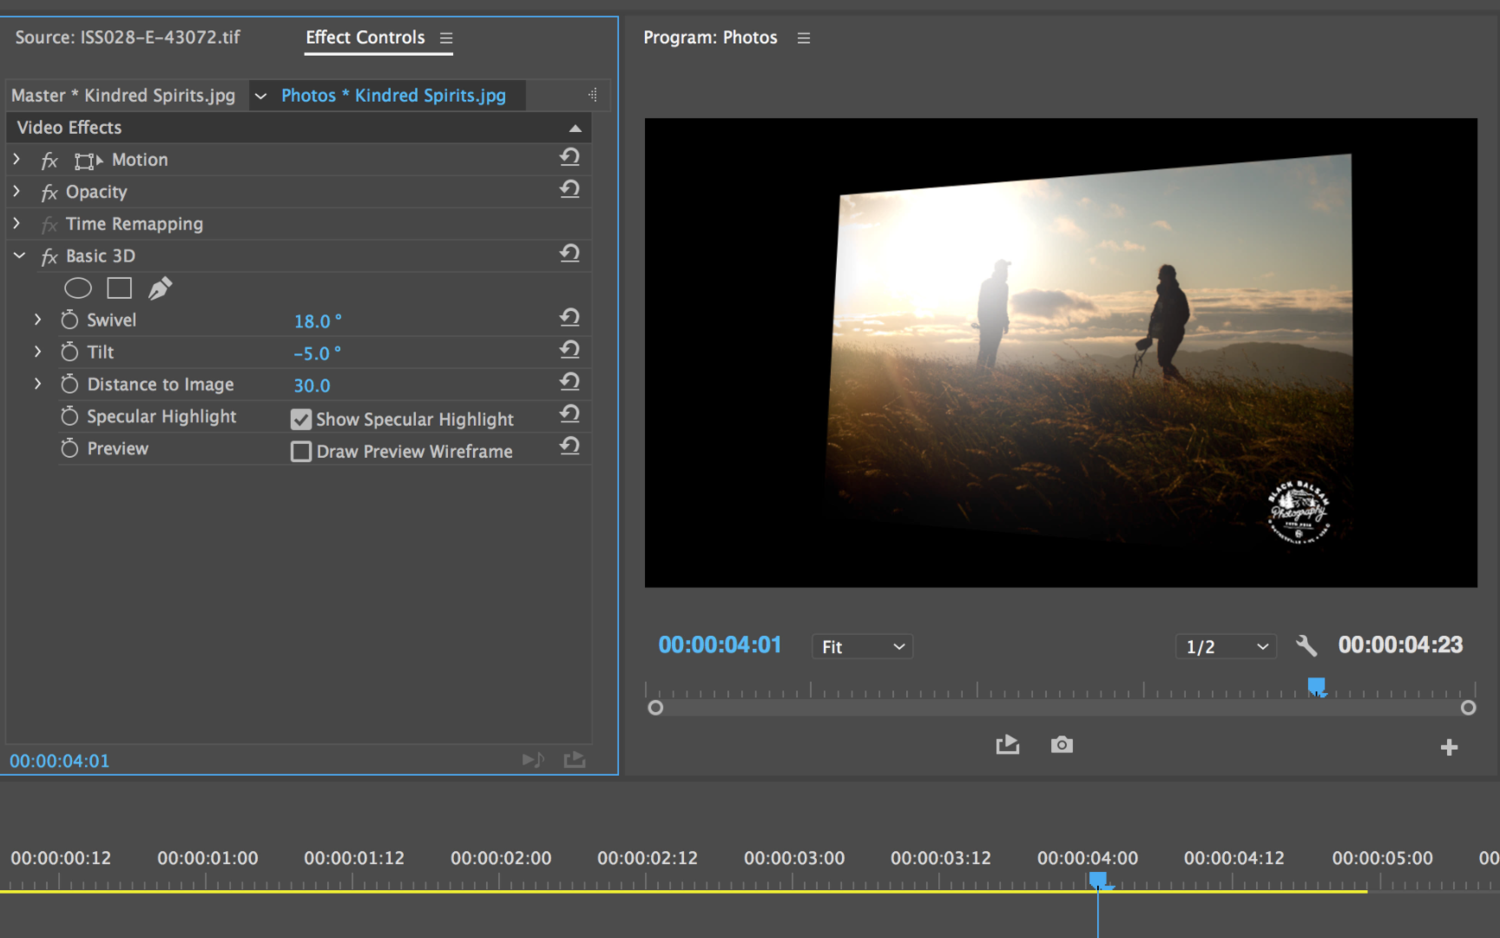
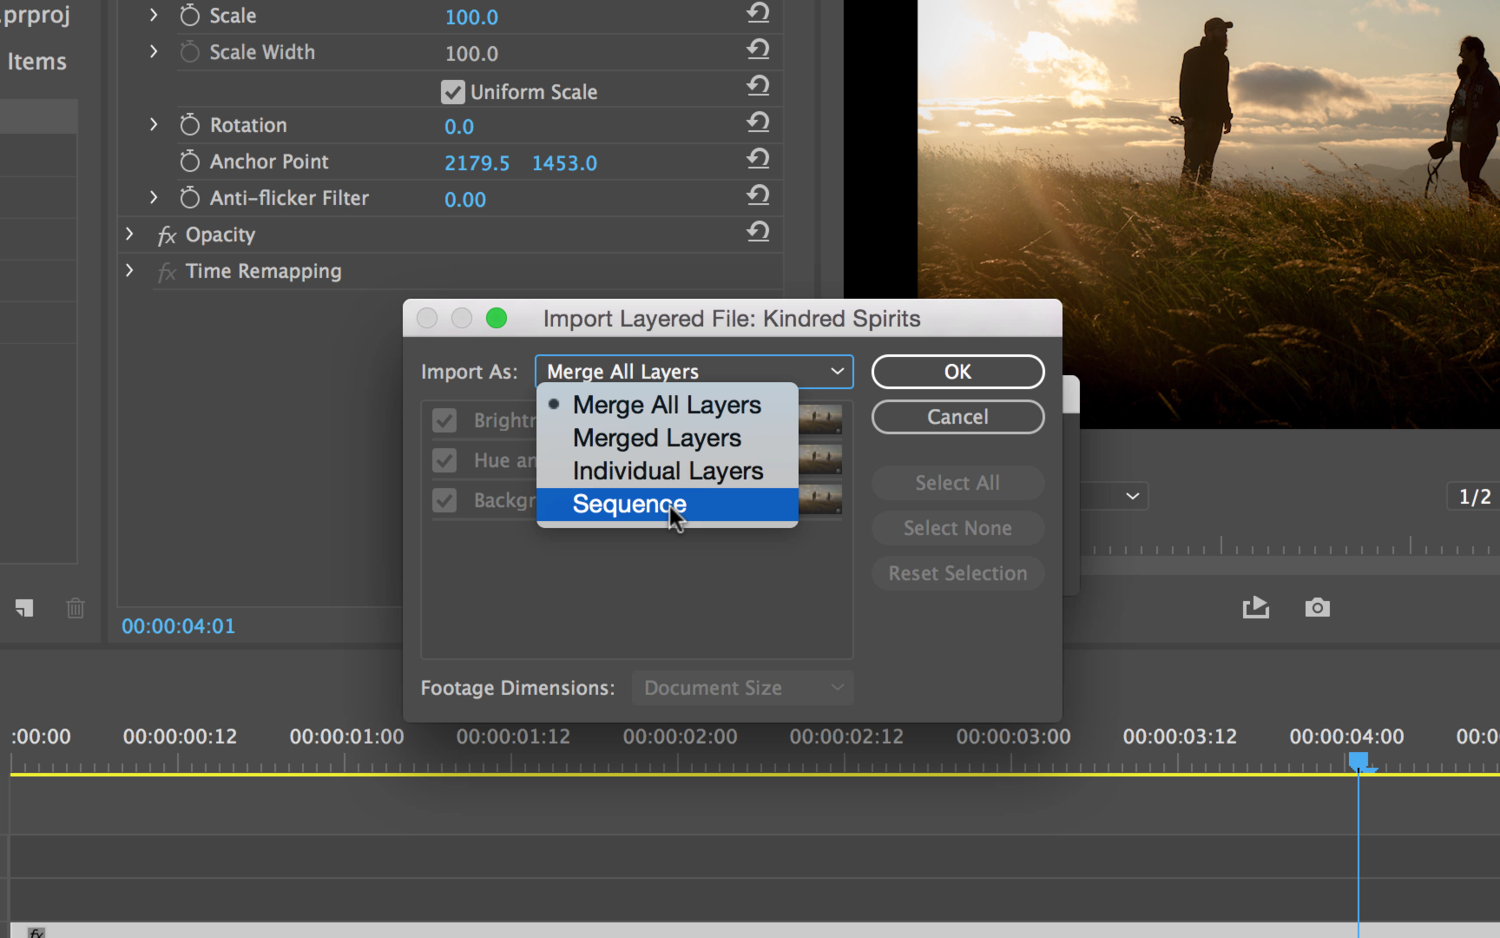
You tin do a lot with photographs in Adobe Premiere Pro: create and customize a fourth dimension-lapse with the automate to sequence feature, import a layered Photoshop file as a complex layered video sequence, or animate your images in 2D or 3D infinite. These are just a few of the things you lot tin achieve. I'm going to bear witness y'all seven tips I utilize when working with however images in Adobe Premiere Pro. This is probably the number i tip when working with photos in Premiere Pro. Be aware that when y'all bring a photo into your timeline, Premiere will automatically calibration your still epitome to fit the frame size of your sequence. In my example, it'southward scaling a high-resolution photo downwardly to 1920x1080 pixels, the frame size of my video sequence. To prepare my photo back to full resolution, I can right click and uncheck Scale to Frame Size. If you ever have any problems with a photograph not cooperating, try to check and uncheck this option. Another smashing tip that volition save you time and give you more control over your withal images is changing the default duration of your photos. The default duration of a photograph in Premiere Pro is five seconds. To change this, go to Preferences > Timeline. In the Preferences dialogue box you'll see a place where you lot can change the Still Image Default Duration. You can specify a duration in seconds or frames. Let's say I have a sequence of photographs in my Premiere project with which I desire to create a fourth dimension-lapse. I tin can create and customize a quick time-lapse by using the Automate to Sequence feature. To create the time-lapse, I can simply select all of my photos and press the Automate to Sequence button at the bottom of the project panel. This will bring up a dialogue box where I can customize a time-lapse sequence, including the photo ordering, placement, and still clip duration. Some other elementary way to create a time-lapse is to import my group of images every bit an paradigm sequence. To do this, all I need to practise is select the showtime image in my sequence on the local drive. In one case selected, an Image Sequence check box will become active at the lesser of the Finder window. I can cheque this box and and so when I import the epitome it will come in as a video prune. Then I can bring the video clip into my timeline and change the speed of the fourth dimension-lapse with the Rate Stretch (R) tool. To bring a photo to life in Premiere, just use keyframes. To add keyframes to a still prototype, select your image in the Timeline and and so bring upwardly your Issue Controls panel. Click the Toggle Animation push next to the property you lot desire to animate. Add together get-go and end keyframes to add together move to the photograph. I typically add together Position, Calibration, and Rotation keyframes to bring the blitheness to life. In the Effects console of Premiere Pro, yous volition find the Basic 3D outcome. Elevate and drop this effect straight onto a photograph in your timeline to adapt your photo in 3D infinite. Once applied to a still epitome, you will be able to change Tilt, Hinge, Distance to Image, and Specular Highlights attributes of your photograph. Each of these properties has the Toggle Animation push next to it, meaning you can add keyframes and animate accordingly. Photoshop and Premiere work well together. When you import a Photoshop file into Premiere, you accept four unlike import methods from which to choose. These include Merge All Layers, Merged Layers, Individual Layers, and Sequence. You can select which layers yous want to include or leave out, and you tin can specify if you lot desire the import to maintain the Photoshop Document Size or utilize the Layer Size. Working with Photoshop files in Premiere truly deserves a tutorial of its own. i. Calibration to Frame Size

2. Modify the Still Default Duration

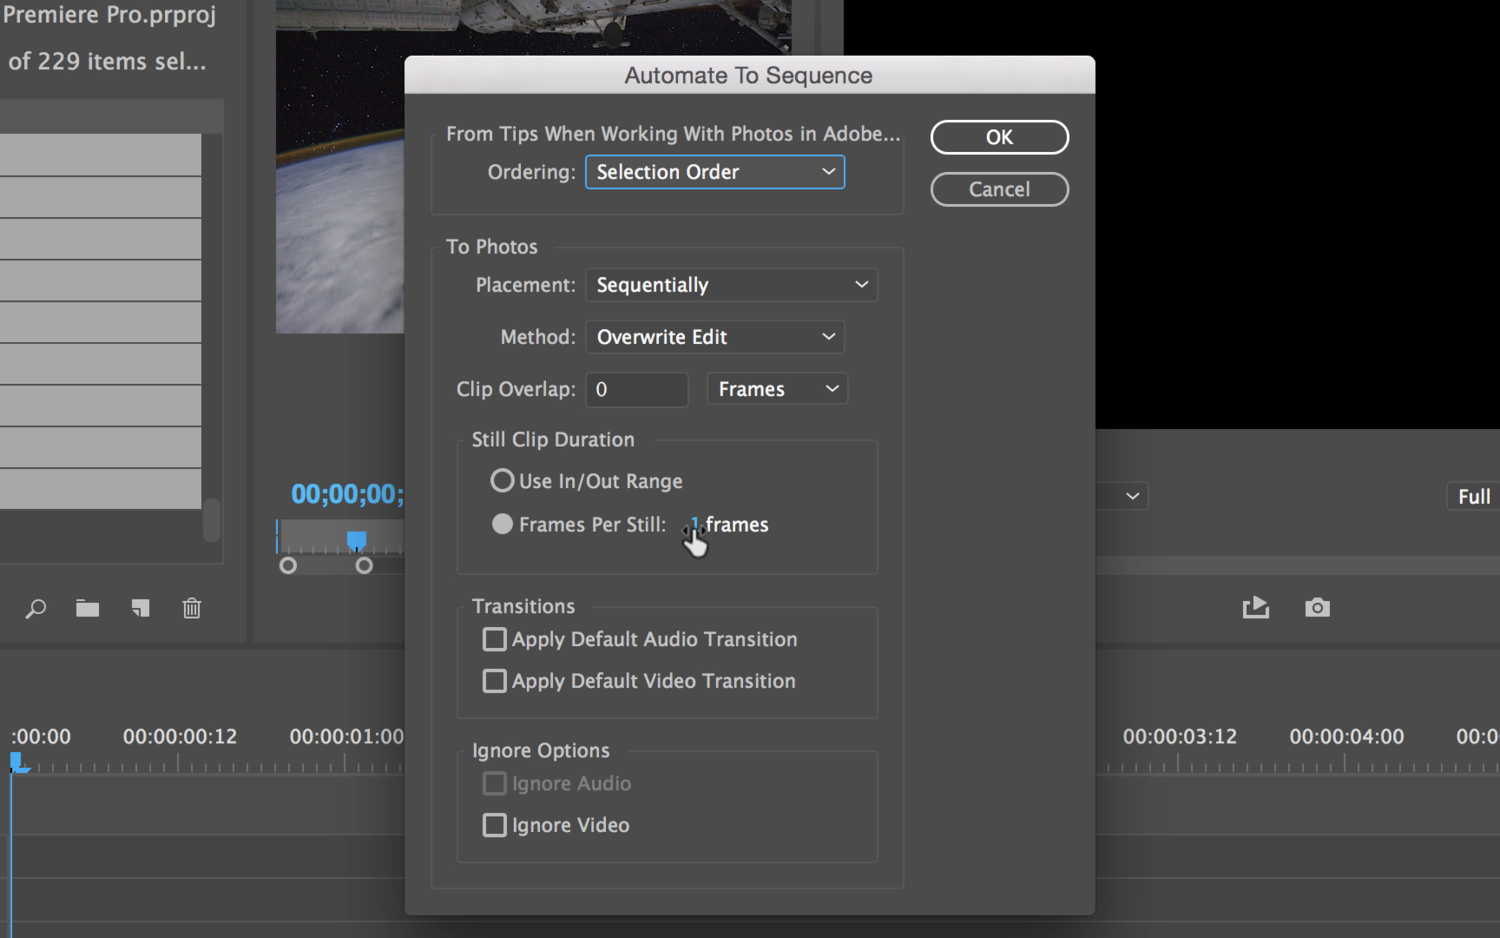
3. Automate to Sequence
iv. Import Epitome Sequence
5. Animate the Photo

vi. Create Basic 3D Movements
7. Import a PSD

How To Change Image Size In Premiere Pro,
Source: https://fstoppers.com/education/seven-tips-when-working-photos-adobe-premiere-pro-178329
Posted by: edgeswitithe77.blogspot.com
0 Response to "How To Change Image Size In Premiere Pro"
Post a Comment